Low-Tech Walstad Bowl with Shrimp: 30-Day Dry Start Log
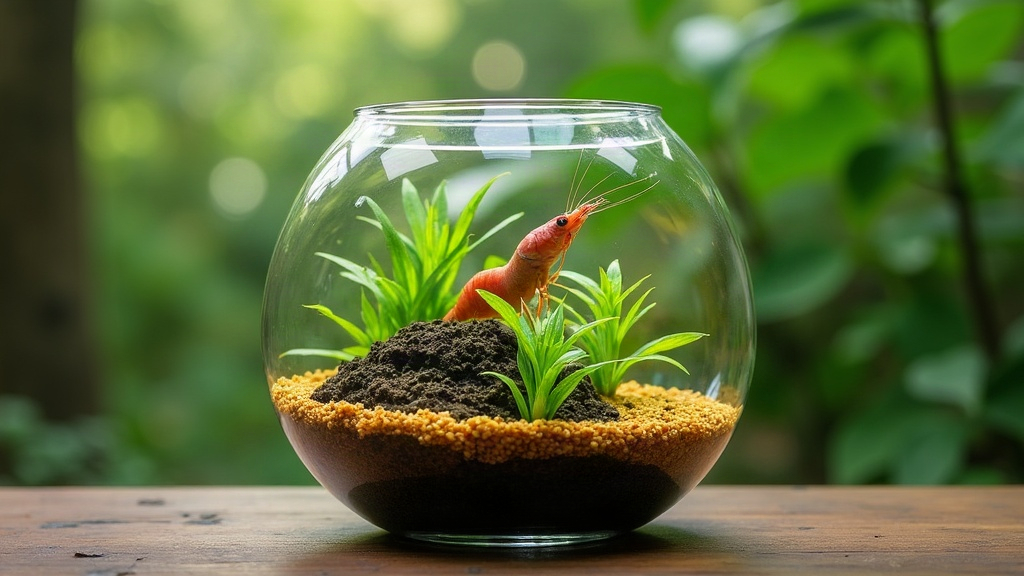
A low-tech Walstad bowl with shrimp might be the most satisfying way to run a planted aquarium without a filter, without CO2 gear, and without babysitting it every day. This 30-day dry start log walks through exactly how a soil-based bowl goes from bare substrate to a fully carpeted, cycled little habitat, and how to bring shrimp in once it’s actually ready for them.
What Is a Walstad Bowl?
The Walstad method, made popular by ecologist Diana Walstad, swaps out mechanical filtration for a living substrate instead. You lay down a bottom layer of nutrient-rich potting soil, cap it with fine gravel or sand, and let fast-growing plants handle the waste that fish and shrimp produce.
Shrink that down into a bowl and you get a tiny, self-regulating ecosystem. Plants strip nitrogen straight out of the water, the soil feeds their roots, and the shrimp add just enough bioload to keep things ticking. No filter to scrub out every few weeks, no CO2 system to dial in. Just light, plants, and time.
Why Use the Dry Start Method?
The dry start method (DSM) grows emergent plants in high humidity before you ever add water to the bowl. Since the plants pull CO2 straight from the air in unlimited supply, carpeting species root down and spread out much faster than they would if they were already submerged.
Here’s why that matters for a shrimp bowl:
- Faster carpet growth - dwarf hairgrass or Monte Carlo can fill in within weeks instead of dragging on for months.
- Stronger roots - the plants get a chance to anchor into the soil before water shows up and tries to float everything loose.
- No algae cycle - starting a tank fully submerged tends to invite an ugly algae bloom early on; DSM sidesteps that problem almost entirely.
- Cheaper setup - you’re not buying a filter, a heater, or a CO2 rig on day one.
The catch is time. You’re looking at roughly a month before the bowl resembles an actual aquarium. But what you get at the end is a genuinely stable tank, one that rarely crashes on you later.
The Setup: Materials and Substrate
This is the exact kit I used for this particular log:
- Bowl: 3-gallon (12 L) clear glass bowl, wide and shallow to maximize surface area.
- Soil: 1 inch of organic potting soil, sifted through to pull out bark chunks and perlite.
- Cap: 1 inch of fine black sand or 2-3 mm gravel.
- Plants: dwarf hairgrass (Eleocharis acicularis), Monte Carlo, and a few Anubias nana petite to add later.
- Light: a small LED desk lamp on a 10-hour timer, sitting 6-8 inches above the rim.
- Mist bottle: filled with dechlorinated water.
Soak the soil first, just until it’s damp but not turning to soup, then press it down flat. Add your cap layer, plant the carpet species in small clumps, and mist until the sand is evenly wet all the way through. Cover the top with plastic wrap, but leave about a one-inch gap so air can still move in and out.
The 30-Day Dry Start Log
Days 1-7: Rooting and First Growth
The bowl stays sealed, misted twice a day. Humidity holds up nicely, and condensation collects on the plastic wrap. Hairgrass blades stay green, and by day five, tiny new shoots start popping up at the base of each clump. No melt, no mold anywhere, which is a good sign the soil’s moisture level is right where it needs to be.
Days 8-14: Spreading and Filling In
Runners start creeping sideways across the sand now. Monte Carlo leaves widen out, and the individual clumps begin to visibly merge into one another. I cut misting back to once a day here, since the roots are finding the nutrient layer on their own. There’s a faint earthy smell in the air around the bowl, which just means the soil is cycling. Totally normal, nothing to worry about.
Days 15-21: The Carpet Thickens
Coverage is around 70 percent by now. Blades grow denser and a bit taller, so I raised the light an inch to keep growth compact instead of leggy. If you notice any leaf tips browning, it’s almost always low humidity, so mist those spots directly and tighten up the gap in the wrap.
Days 22-30: Ready to Flood
The carpet is thick and well anchored at this point. Over the last three days, I gradually acclimated the bowl to open air by poking a handful of small holes in the plastic wrap. By day 30, the plants held their color even in normal room humidity, a sign they were finally ready for water.
Flooding the Bowl
Fill slowly. Use a length of airline tubing to siphon dechlorinated water onto the sand so you don’t rip up any roots in the process. Stop filling once the water sits about an inch below the rim.
Some melt is expected here. Leaves that adapted to air often yellow off as submerged leaves take over, and that’s completely normal, not a sign of failure. Keep the light on 8-10 hours a day, and hold off on shrimp for now. Let the bowl run plant-only for two to three weeks while it settles into itself.
Test the water weekly during this window. You want to see ammonia and nitrite drop to zero while nitrate stays low and steady. Once those readings hold and you start spotting new submerged growth, the bowl has matured biologically.
Adding Shrimp Safely
Neocaridina davidi, cherry shrimp and their various color forms, are hands-down the best fit for a bowl like this. They handle a wide temperature swing without fuss, breed easily, and happily clean up biofilm and soft algae.
A few stocking notes:
- Number: start with 6-10 shrimp in a 3-gallon bowl.
- Acclimation: drip-acclimate them for 1-2 hours so they can adjust to the bowl’s pH and hardness gradually.
- Temperature: aim to keep the room between 68-78°F (20-26°C); a heater usually isn’t necessary in a warm house.
- Feeding: offer a small pinch of shrimp food once or twice a week, and pull out anything uneaten after a few hours.
If you want a pure shrimp bowl, skip snails entirely at first, or drop in one nerite snail later on if you want help keeping the glass clean.
Ongoing Low-Tech Care
Once a Walstad bowl matures, it runs pretty close to on autopilot. Weekly upkeep takes maybe ten minutes, tops:
- Top off evaporated water using dechlorinated or RO water.
- Change out 10-20 percent of the water every one to two weeks.
- Trim the carpet back once it grows tall enough to start shading itself.
- Wipe the glass gently so your viewing pane stays clear.
Stay away from digging into the substrate, and never vacuum the soil layer. That’s exactly where the beneficial bacteria and root nutrients are living.
Conclusion
A low-tech Walstad bowl with shrimp proves you don’t need a pile of equipment to run a healthy aquarium. The 30-day dry start asks for patience, sure, but what it hands back is a dense, algae-free carpet and a stable little home for a colony of cherry shrimp. Take it slow, let the plants do the heavy lifting, and this bowl will keep going strong for years.